Creative production
How to collaborate on Premiere Pro: a complete guide for teams
Last updated 04 September, 2025
7 mins
Tight deadlines + multiple editors = chaos.
Unless you know the right way to collaborate in Premiere Pro.
Adobe offers several workflows for Premiere Pro collaboration, but choosing the wrong one can slow your project to a crawl.
In this guide, we’ll break down how to collaborate on Premiere Pro with the three main collaboration options (Project Sharing, Team Projects and Productions) and show how shared storage like LucidLink can make every workflow smoother, faster and less stressful.
3 ways to collaborate in Premiere Pro
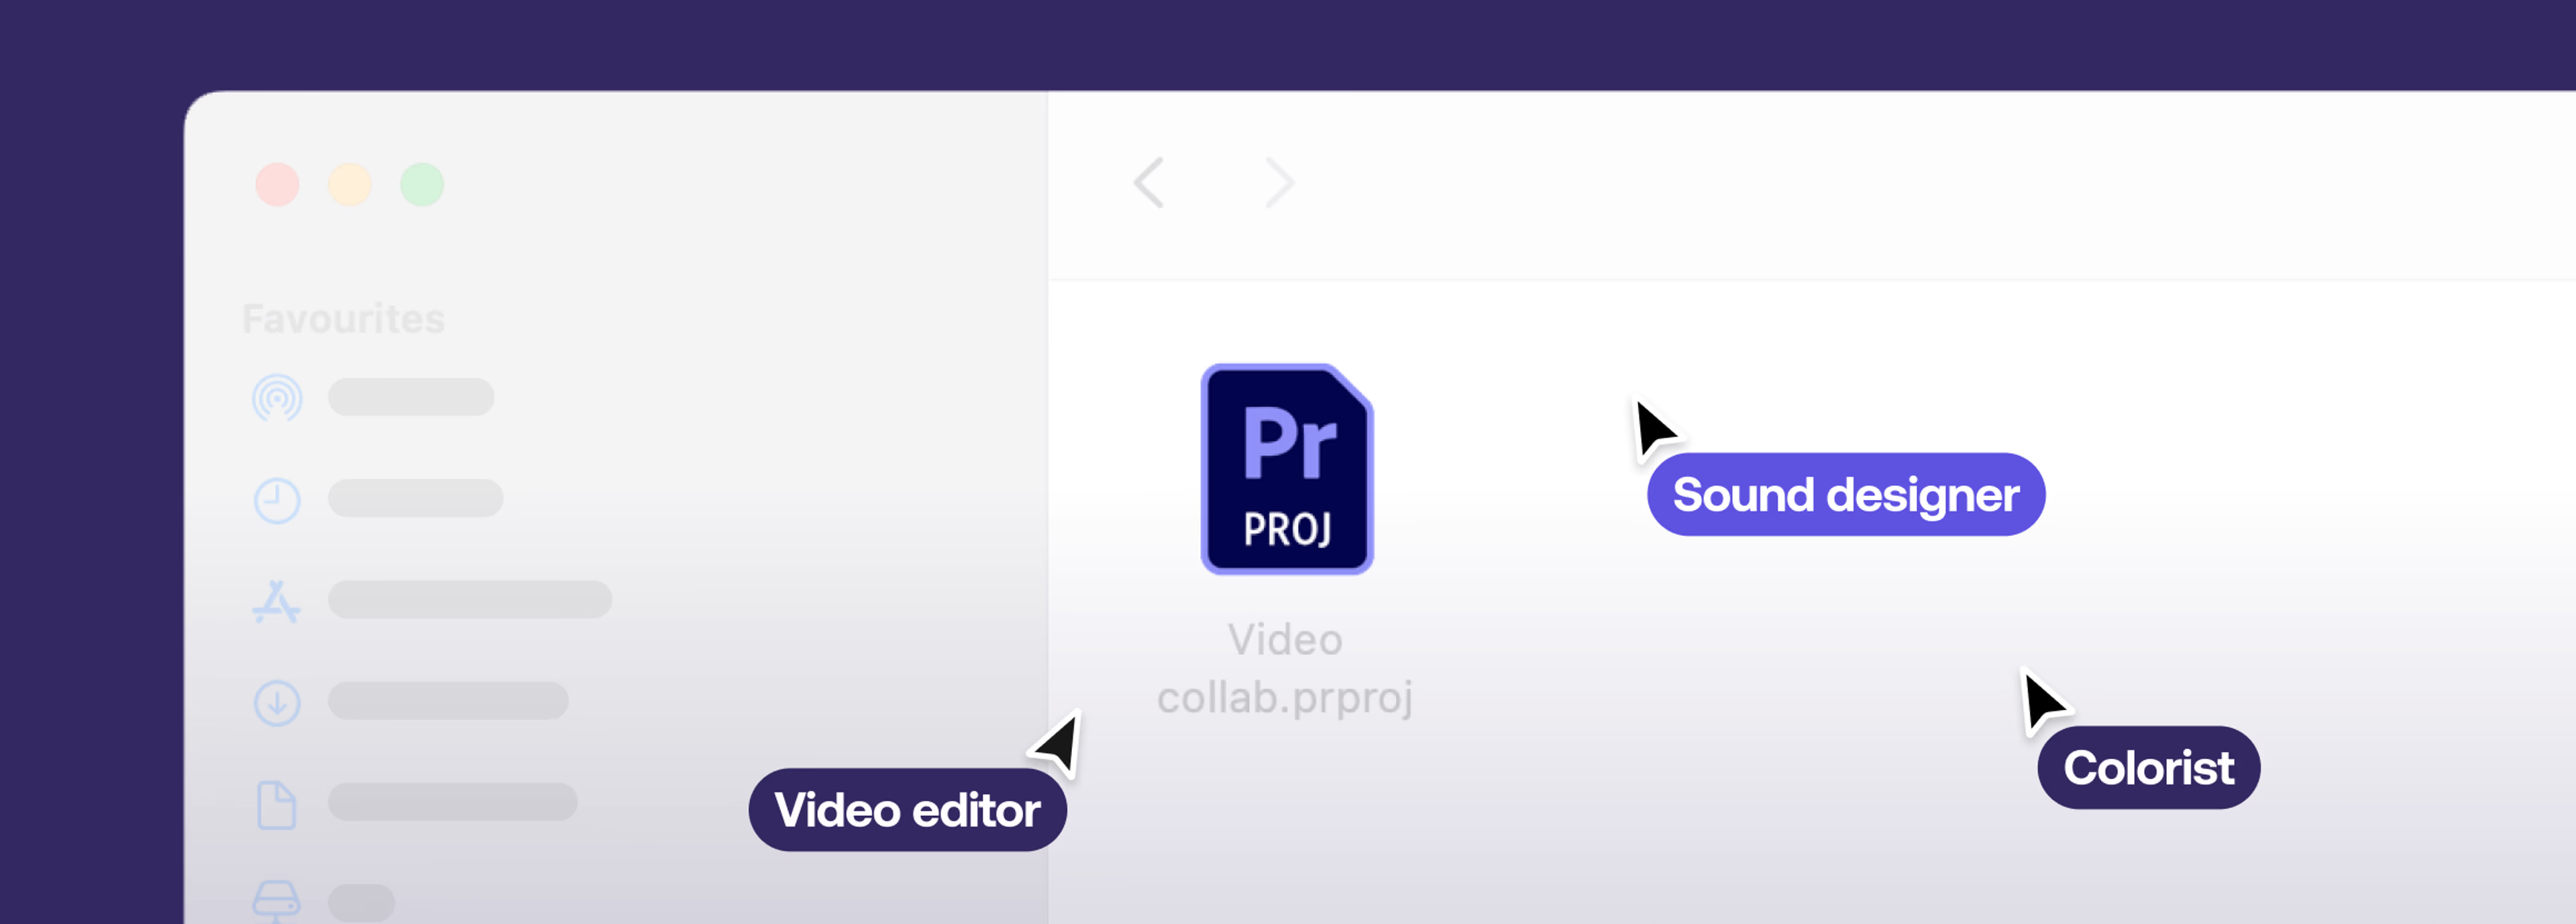
Collaboration in video editing can mean a lot of things:
Multiple editors working on the same project at once
A relay race handing off assets to VFX, sound or clients
Collecting feedback from stakeholders
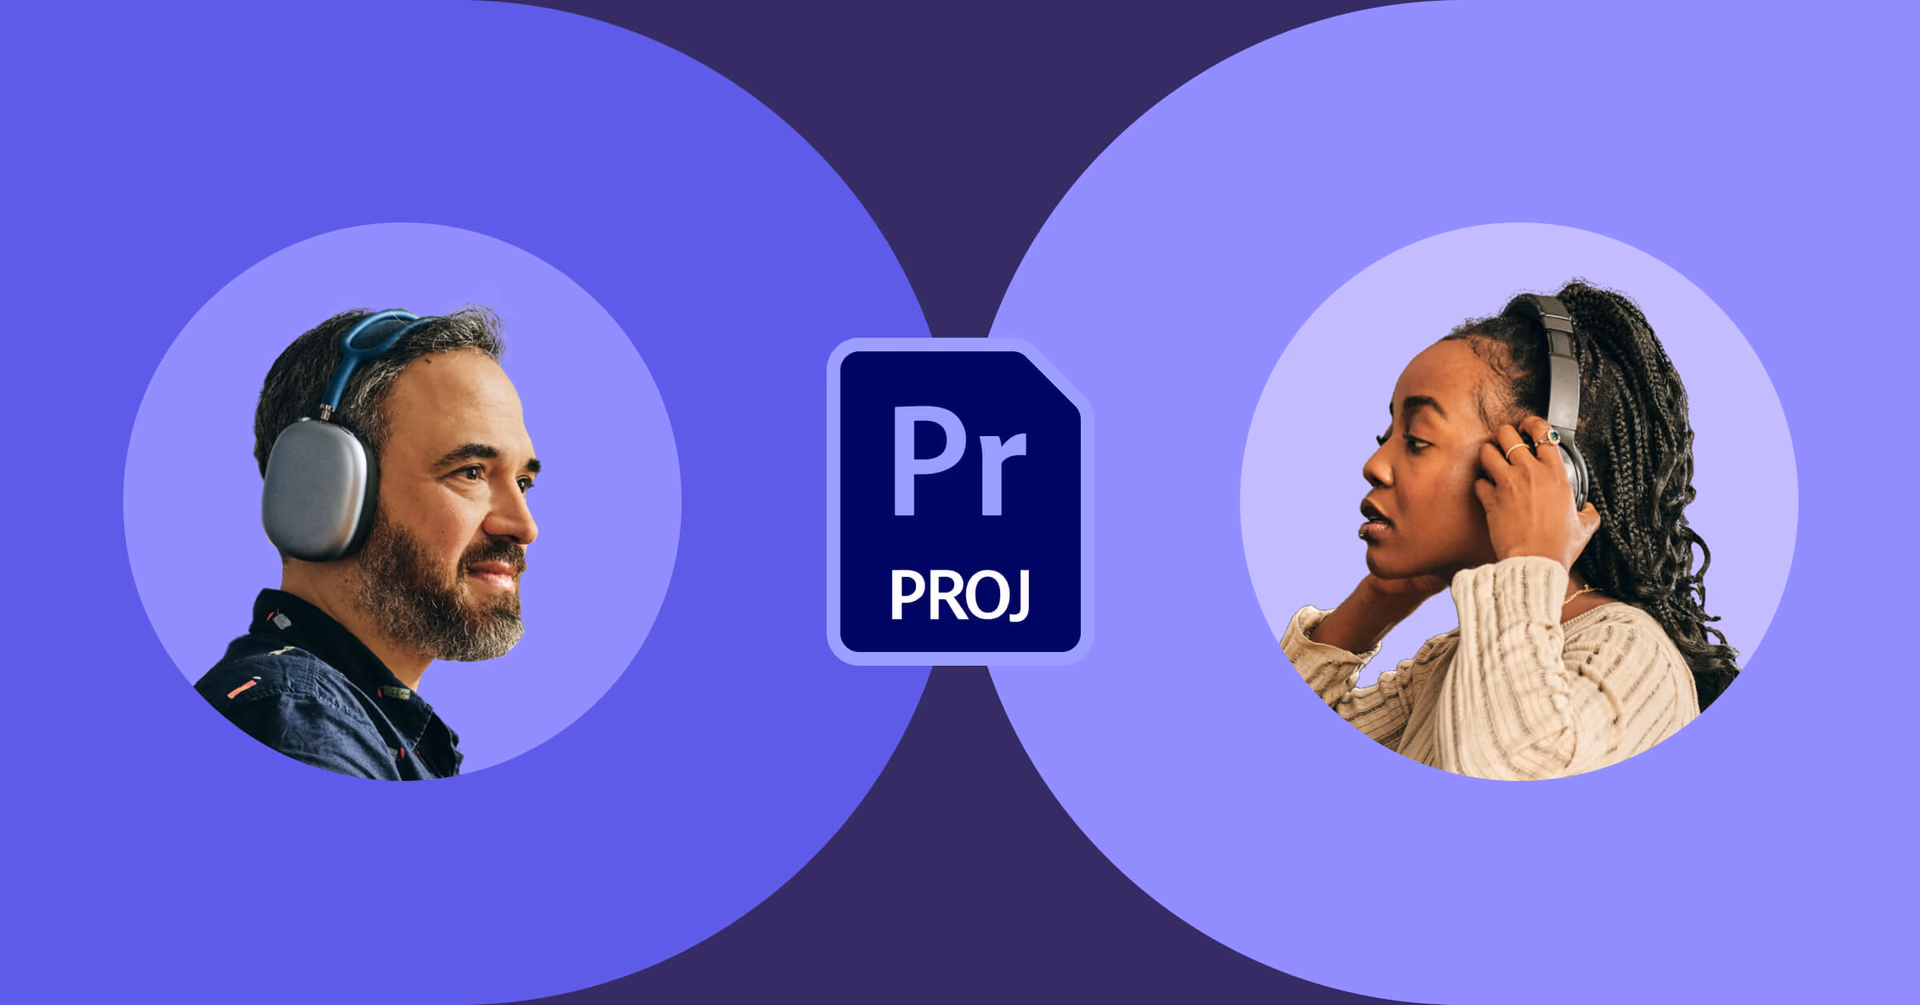
For this guide, we’ll focus on real-time collaboration, where multiple people edit the same project simultaneously.
Here are the three main options for Premiere collaborative editing:
Project Sharing: passing project files back and forth
Team Projects: editors working in the same cloud-synced timeline
Productions: large projects split into sub-projects so multiple editors can work in parallel
So, which should you use? It depends on your project size, team setup and workflow needs. We’ll break down how each works, what it’s good for and where it might trip you up.
Want to see real-world collaboration in action? Check out Creativity Unbound – Episode 2: Sandwich, where a distributed team uses Premiere to cut a commercial.
1. How to collaborate with Project Sharing in Premiere Pro
The easiest way to team up with other editors in Premiere Pro? Project Sharing.
Pros:
Easy to set up
Works for small projects
No shared storage required
Cons:
Hard to keep files in sync
No simultaneous collaboration
Not ideal for complex projects
Why shared storage helps:
Without shared storage, passing projects quickly becomes messy: relinking media, syncing changes and managing file versions wastes valuable time. With a platform like LucidLink, every editor sees the same media instantly without relinking or waiting.
2. How to use Adobe Premiere Team Projects for real-time collaboration
Adobe Premiere Pro Team Projects live in the cloud (the Creative Cloud to be exact).
When you create an Adobe Premiere Team Project, Adobe syncs a master project file in the cloud. Collaborators can then join, edit simultaneously and publish changes back. This makes it one of the most powerful options for Premiere Pro collaboration.
Pros
Work simultaneously on the same project and timeline
Convert existing Premiere projects to Team Projects
No extra cost for Creative Cloud subscribers
Cons
Requires consistent file paths and names across collaborators
Changes must be manually published
Sequence conflicts need to be resolved manually
Only available to Creative Cloud subscribers
Want a walkthrough? Mary Betsy’s tutorial shows how to set up a Team Project and handle conflicting edits.
Shared storage makes it easier:
Adobe’s Team Projects assume everyone has a local copy of the same media or access to shared storage. Without it, syncing becomes tricky. With LucidLink, collaborators simply point Premiere to the same cloud-based drive, skipping relinking and manual file management.
How to set up a team project in Premiere Pro
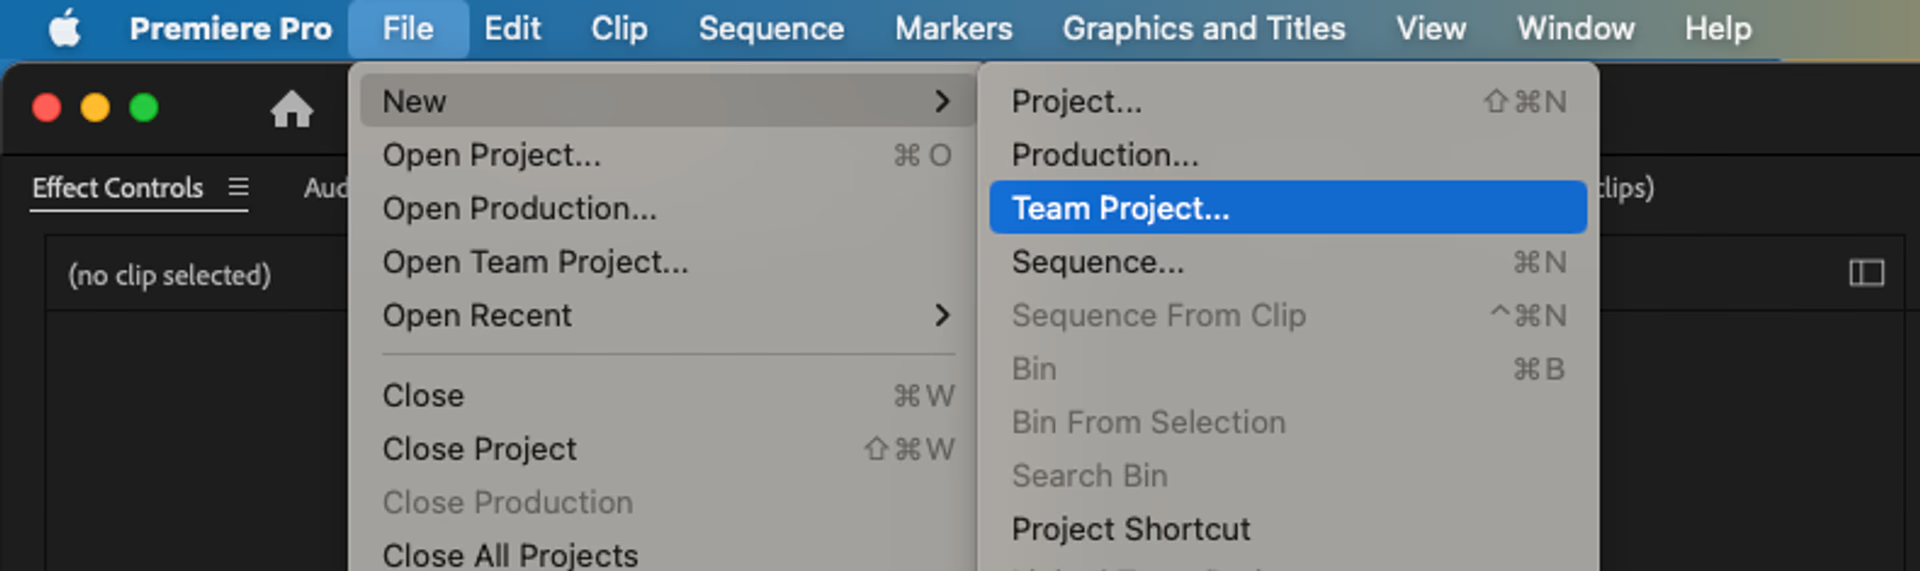
Go to File > New > Team Project (or convert an existing project).
Invite collaborators via their Creative Cloud email (important: must match their subscription email).
Each collaborator should set their scratch disks to a unique location.
Collaborators accept the invite under File > Open Team Project > Invites tab.
3. Collaborate with Productions in Premiere Pro
Productions are designed for large projects, like TV series or feature films and is the most scalable approach to Premiere collaborative editing.
Instead of one giant project, Productions split the edit into smaller, connected sub-projects. Editors can work in parallel without bloating project files or duplicating media.
Pros:
Video collaboration across teams
Project locking prevents conflicts
Shared storage eliminates duplicate media
Works offline (great for secure environments)
Cons:
Requires shared storage
Organizational discipline is essential
Flexible workflow may require adaptation
Why Productions work
Productions feel familiar to Avid users, Adobe’s equivalent of bin locking. When one editor has a project open, others can view it but not change it. This prevents conflicts and keeps workflows moving like a relay race.
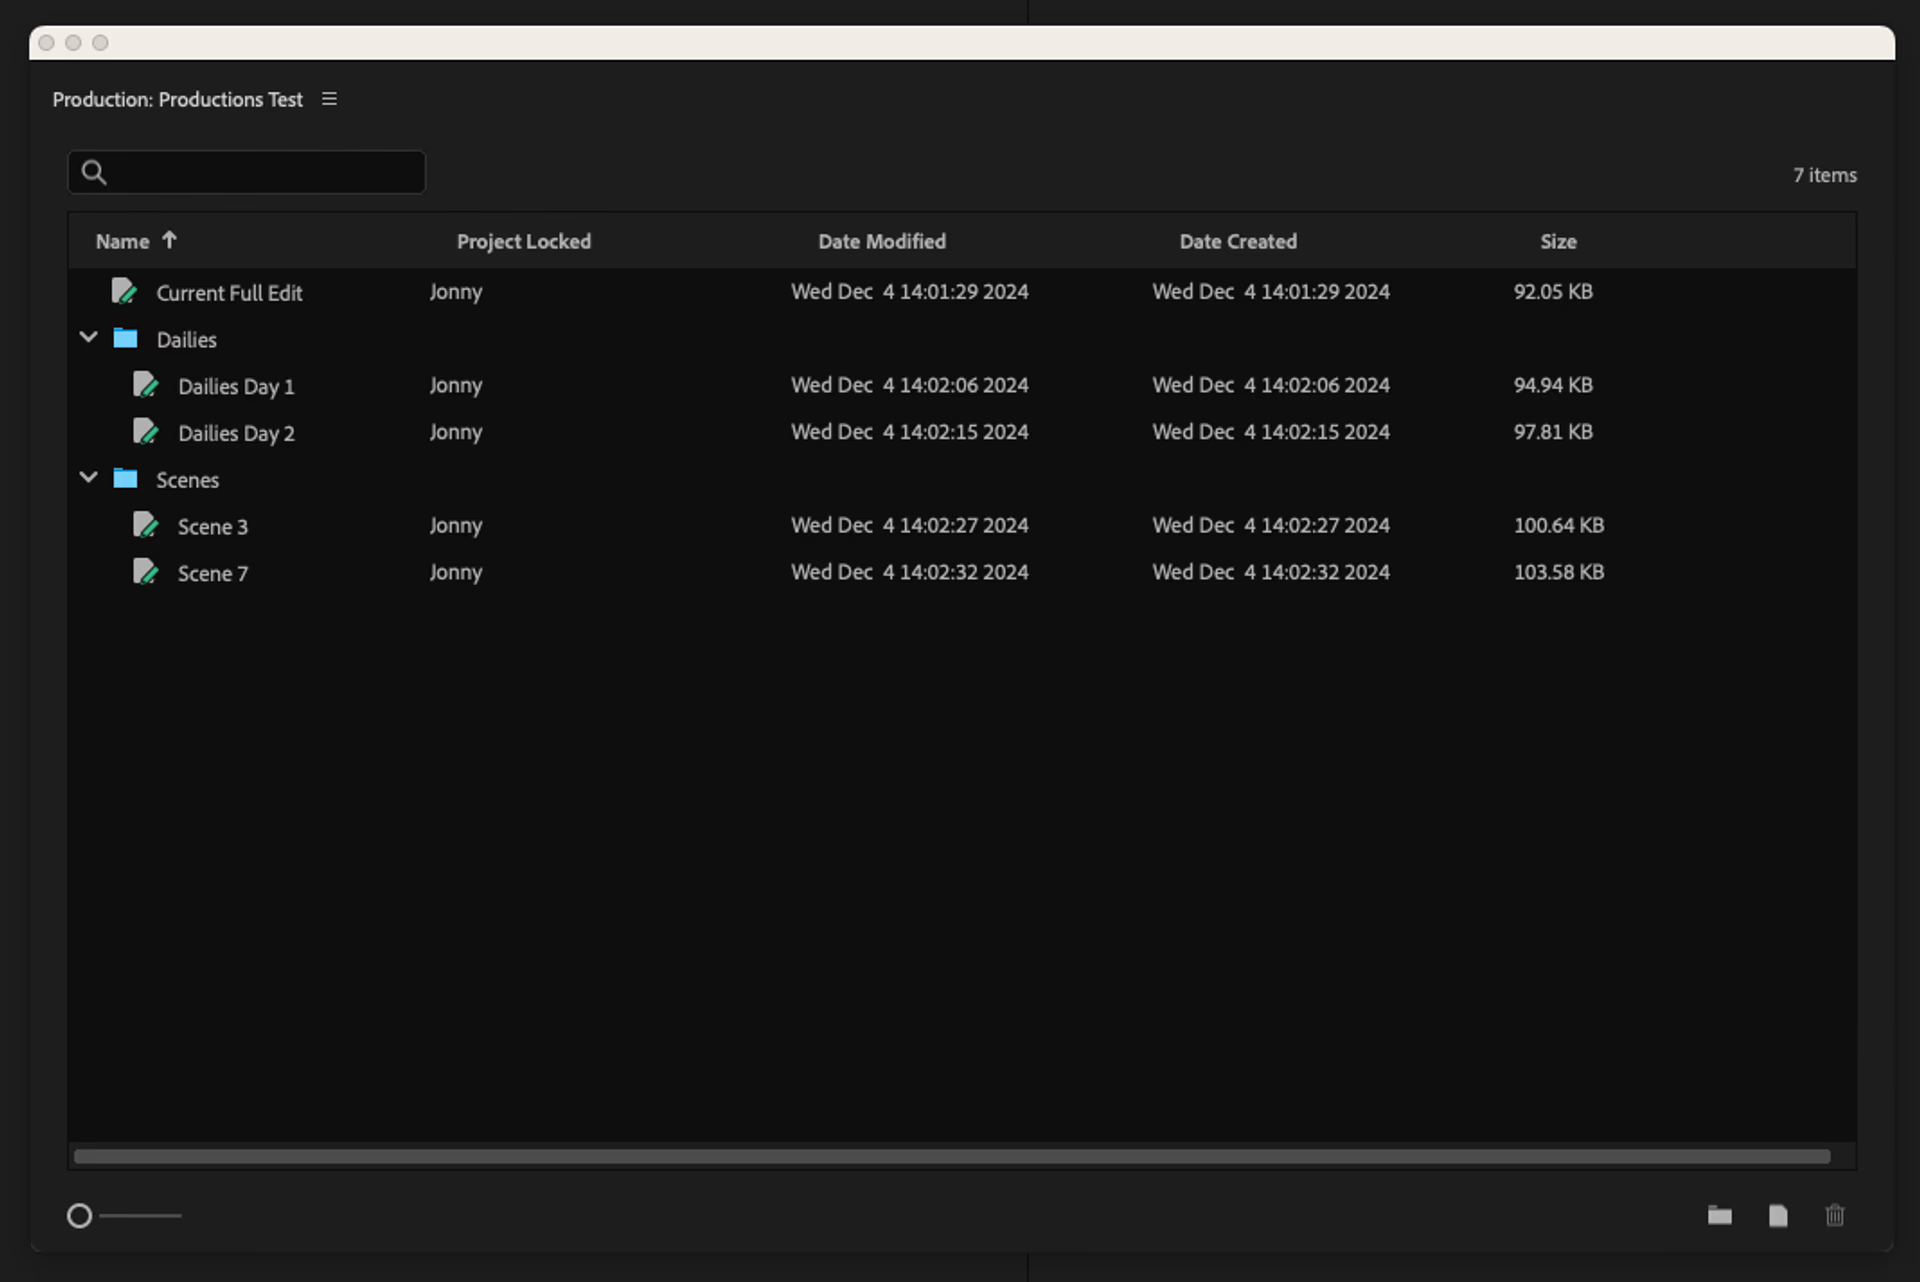
For example:
An assistant editor prepares dailies in a Dailies project.
The editor cuts Scene 3 while the assistant organizes Scene 4.
Once Scene 3 is done, it’s passed to sound design while the editor moves to Scene 7.
Best practices for working in Productions:
Break projects into smaller components so tasks can be handed off without blocking others.
Set your collaboration name (Premiere Pro > Settings > Collaboration) so teammates know who has a project locked.
Use external communication tools like Slack, email or WhatsApp to coordinate, since Productions doesn’t include built-in chat.
How to set up a Production
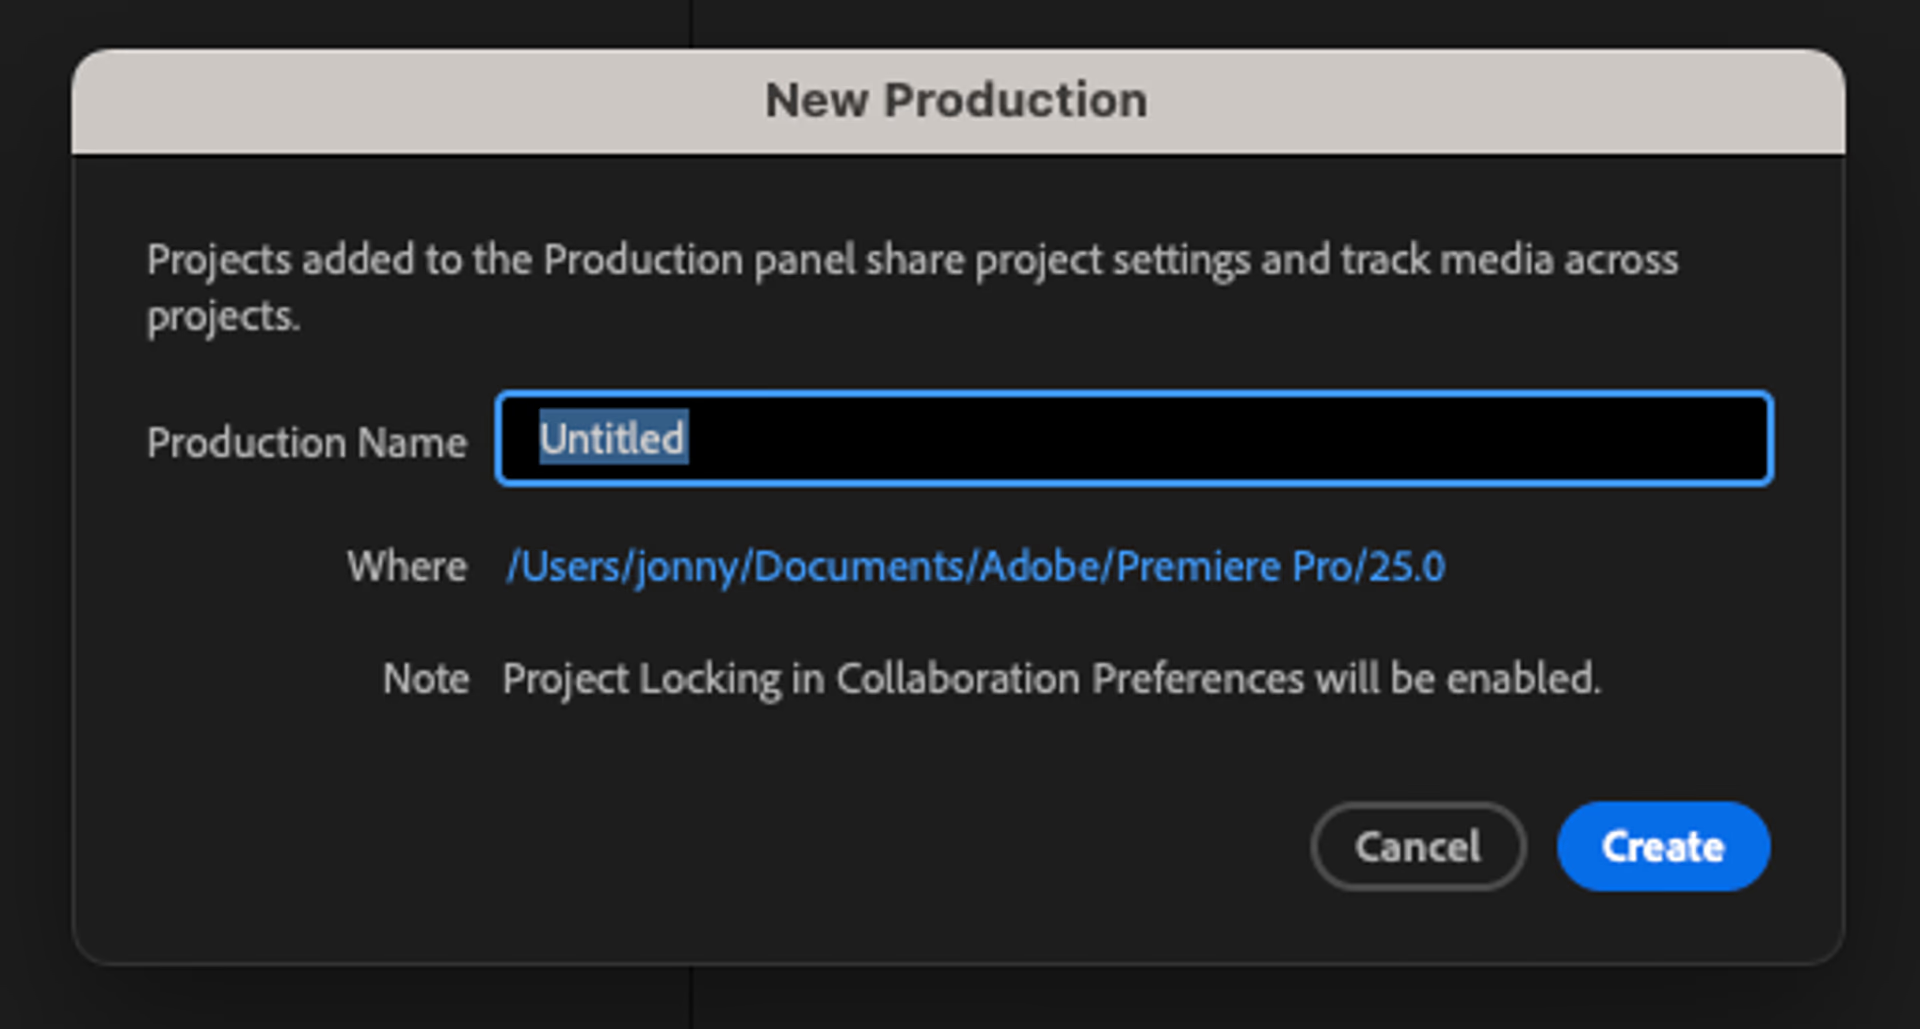
Go to File > New > Production.
Save the Production on a shared storage drive (local NAS or cloud-based like LucidLink).
The first time you open it, Premiere launches the Production Panel in the Production workspace.
To open existing Productions: File > Open Production… and select the folder with the Production name.
Tip: this will open a window that lets you select from any previous Production you have access to. Or, you can hit ‘Browse’ and navigate to the folder which is the name of the Production. Select this folder to open the Production rather than any of the projects inside that folder.
Adobe’s Karl Soule has an excellent series on getting started with Productions. His tutorials cover best practices for setting up Productions, plus troubleshooting tips for when things go awry.
What is the best way to collaborate in Premiere Pro?
So what’s the best way to collaborate in real time in Premiere Pro? Well, that depends on:
The kind of project you’re cutting
How many collaborators you have
The wider context of the edit (budget, deadline etc.)
Single Projects are fine when only one editor needs access at a time. Think of it like a relay race where files get passed back and forth.
Team Projects work best for smaller teams or fast-turnaround edits, letting multiple artists contribute at once. The tradeoff is that coordination is crucial to avoid conflicts.
Productions are built for large-scale, long-form projects with many moving parts. Editors, assistants, motion graphics, sound, all working from the same material. They shine when teams need to divide and conquer across different sections of a project.
Want to see how this plays out on an award-winning production? Joanna Naugle, editor of The Bear, used Premiere Productions and LucidLink to make remote collaboration possible.

Cutting The Bear: Premiere Productions and LucidLink in action
When FX set out to bring the chaos of a Chicago kitchen to life in The Bear, the editorial team faced a major challenge: remote post-production during the pandemic, tight deadlines and mountains of B-roll.
The result? A critically acclaimed hit that’s won Emmys, Golden Globes and an ACE Eddie award, all thanks to smart collaboration tools and airtight workflows.
This real-world workflow shows how Premiere Pro collaboration scales from indie projects to award-winning television.
The challenge: editing chaos from afar
Season 1 was cut almost entirely remotely by editors Joanna Naugle and Adam Epstein, with assistant editors handling overlapping dialogue, relentless pacing and massive volumes of footage.
By Season 2, the team had expanded into a hybrid setup, part remote, part in-person but still needed a way to stay seamlessly in sync.
How the workflow held up
The team relied on Premiere Pro Productions to keep episodes organized and coordinated, sharing everything from B-roll to montages across episodes.
LucidLink provided a cloud-based filespace that worked like a shared server, eliminating the constant relinking and drive-mirroring that typically slows down remote work.
Collaboration without compromise
With Productions and LucidLink working together, the team could edit as if they were in the same room, without worrying about storage headaches.
“Using LucidLink for our shared storage eliminated that headache and allowed us to focus on the creative aspects of editing rather than the tedious parts of media management.” — Joanna Naugle, Editor
Lessons for your workflow
Keep Productions structured and labeled for easy navigation
Use LucidLink or another cloud-first storage to cut out relinking chaos
Combine async focus time with real-time collaboration (Slack, Zoom, in-person sessions)
Trust instincts and avoid over-editing, momentum matters more than perfection
Want to see how it all came together? Read the full story here.
Best practices for collaborating in Premiere Pro
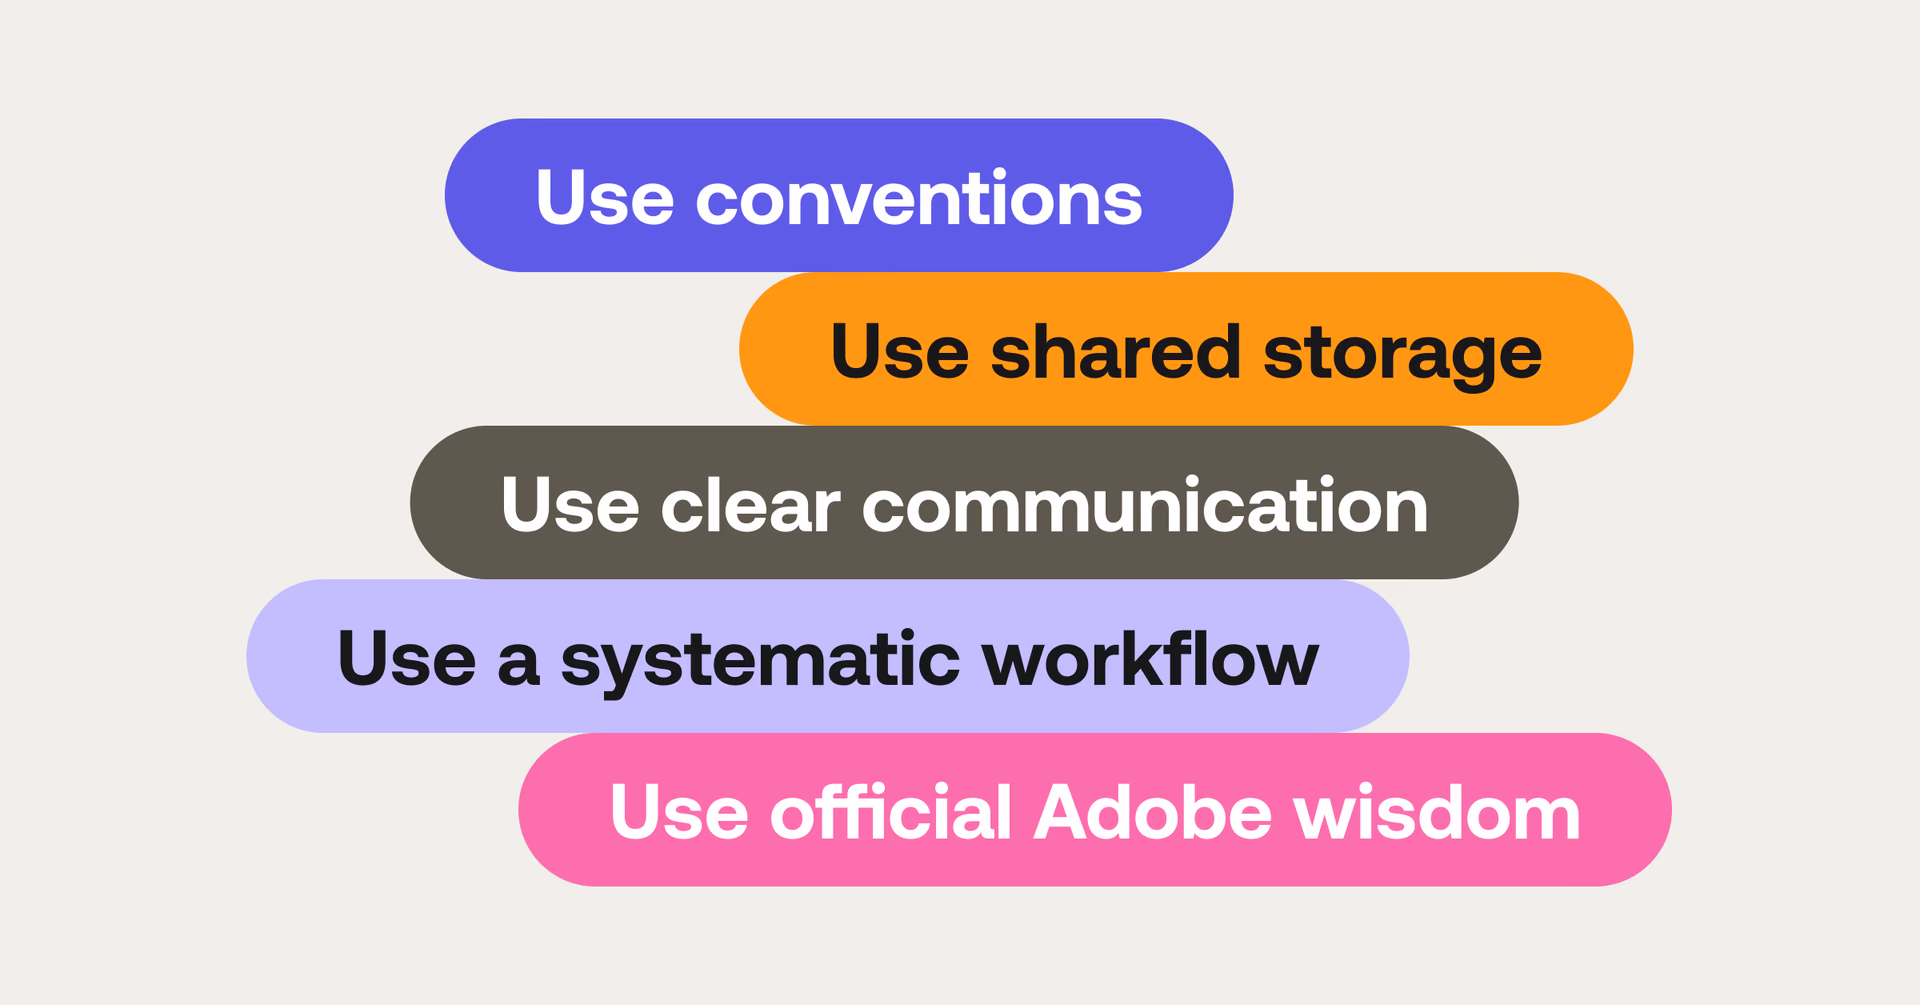
Collaborating in Premiere Pro isn’t just about choosing the right tools — it’s about using them the right way. Here are some best practices to make working together smoother and less stressful:
Use conventions: clear naming, versioning and project organization keep everyone on the same page
Use shared storage: platforms like LucidLink remove 75% of manual media management
Communicate clearly: track changes in email, Slack or a change-log document
Follow a systematic workflow: Standard processes prevent confusion
Use Adobe resources: according to Adobe’s workflow guidelines, teams should set up shared libraries and version control to avoid duplication. This ensures everyone works from the same creative assets, reducing rework and speeding up collaboration.
How LucidLink helps you collaborate in Premiere Pro
LucidLink is cloud-based shared storage that behaves like a local drive but scales like the cloud. It streams only the data you need, so you can start editing instantly without massive downloads.
Why LucidLink is made for collaborative video editing:
Seamless media access: all editors see the same files, instantly.
Real-time sync: no more version mix-ups.
No waiting: work with massive files right away.
Premiere Pro panel: manage LucidLink directly inside your edit.
Paired with tools like Frame.io (feedback) and MASV (file delivery), LucidLink becomes a single source of truth for all project media.
Whatever Premiere workflow you choose, Project Sharing, Adobe Premiere Team Projects or Productions, shared storage removes the bottlenecks. With LucidLink, your team stays in sync, skips relinking and delivers faster.
Try LucidLink free and streamline your next Premiere collaborative editing project.
FAQs
You can collaborate in Premiere Pro by using Project sharing, Team Projects or Productions. Each has different levels of real-time collaboration. Shared storage — like LucidLink — makes it easier by giving teams instant access to media without the back-and-forth of file transfers.
Keep reading

Creative production
Collaboration
How to send videos without losing quality: 3 best ways
Learn how to send videos without losing quality with these three easy methods. Discover the best tools for fast, high-quality video collaboration.
15 July 2026, 6 mins read

Creative production
7 best ways to send large audio files
Distributed teams working on creative projects need to know how to send large audio files securely and efficiently. Read on to learn the best methods.
26 May 2026, 8 mins read

Collaboration
Creative production
Video content marketing guide: how to scale in 2026
Get strategies to produce high-quality video content marketing at scale — without slowing production or overloading your team.
26 May 2026, 14 mins read
Join our newsletter
Get all our latest news and creative tips
Want the details? Read our privacy policy. Not loving our emails?
Unsubscribe anytime or drop us a note at support@lucidlink.com.